


How to Use a Foam Roller for Your Back Pain

Updated: Jun. 10, 2021
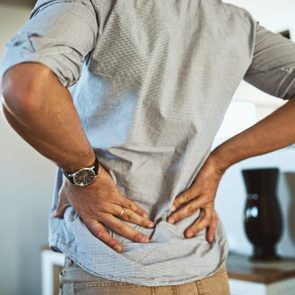
When your back feels tight, using a foam roller for back pain may help. These foam rolling exercises can help alleviate pain and soreness.
Foam roller for your back
Chances are by now you’ve seen (and possibly used) the cylinders of foam that have popped up at gyms, physical therapists’, and chiropractors’ offices.
In exercise communities, words like “trigger point therapy” and “myofascial release” are used in reference to foam rolling as though this form of self-massage is the cure-all, end-all therapy for muscle pain problems. One of its many popular uses is as a pre- and post-workout tool to boost circulation and flexibility.
(Try these foam roller exercises.)
But, as with most things that are physical in nature, “it’s complicated” is a better way to describe the benefits of foam rolling for back pain.
Benefits of foam rolling
The reality is that there are proven benefits of foam rolling. But it’s important to apply these findings in the right way if your goal is to reduce back pain.
“A few research studies have shown that foam rolling can improve joint range of motion, especially when coupled with static stretching,” says Ai Mukai, MD, a board-certified physical medicine and rehabilitation physician with Texas Orthopedics Sports & Rehabilitation Specialists. “We know that tight hip flexors, hamstrings, and even knees can affect the lumbar spine and cause unhealthy pressure points and stress. Foam rolling has also been shown to delay muscle soreness and improve recovery.”
This means that foam rolling, used correctly, can help maintain or improve joint flexibility, reduce muscle soreness after a workout, and improve recovery time. All of which can help reduce or prevent acute back pain, especially pain related to post-exercise recovery. (To recover correctly, here’s what to do after the gym.)
When foam rolling may do more harm
The problem, though, is that when used incorrectly, foam rolling could cause more pain or damage. There are a couple reasons why. First, back pain may be caused by issues unrelated to joint flexibility or muscle tightness, such as a bulging disc or osteoarthritis of the spine. In cases such as these, placing pressure on the surrounding muscle fibers to “loosen them up,” may be unproductive in the long run. (Try these yoga poses for lower back pain.)
“What if these painful spots are merely the symptom of the issue and not the root cause?” says Michael Ross, a chiropractor, strength and conditioning specialist, and diplomate of the American Chiropractic Rehabilitation Board. “What if the tight areas are guarding and protecting? We know that a mechanical stimulus inhibits pain signals, so are we actually turning off the pain, not treating the issue?”
In cases such as these, Ross likens foam rolling for persistent back pain to a drug addict needing a fix every day. Foam rolling may, in fact, reduce pain. But it may not actually solve the underlying problem. Does that make foam rolling outright wrong if it offers relief? Probably not. Especially when rolling is used for acute muscle soreness or as a way to regain mobility that has become restricted due to lifestyle issues, such as sedentary desk jobs, poor posture, and general lack of movement.
(Here are the best lower back pain relief products.)
Incorrect use of foam roller
A potential issue that can contribute to prolonged pain is how the foam roller is used. Some trainers, athletes, and foam roll advocates view this method of recovery and self-massage as a “no pain, no gain” practice in self-flagellation. Essentially, they advocate for finding your worst muscle “knots” and then applying extreme pressure to the point of intense pain until the adhesion is released and your muscle feels less constricted.
In some cases, this type of pressure can be appropriate and helpful. But, extreme pressure performed incorrectly can actually cause more muscle damage or even bruise bone tissue. And if applied in areas where there are other, underlying issues, you may end up with more problems than you started out with.
How to use a foam roller
When you first give foam rolling a try, it’s a good idea to start with a less dense roller (one that’s a little softer). Think “massage” as you roll out your muscles. In other words, you should apply pressure, but the pressure should feel good, if a little uncomfortable—not like your muscles are being flattened by a steamroller. Also, be cognizant of the speed and location of where you’re directing pressure, and whether you feel stable while balancing on the roller.
“Anything that can make you so unsteady that you end up being jerked into bad positions can hurt you,” says Dr. Mukai, “Also, the back has more superficial bones compared to some of the other muscular areas of the body and you can end up bruising the bones if you put too much pressure on the bony prominences.”
As such, you should go slow. Stick to placing pressure on muscles, rather than bones or joints (with a few exceptions). And avoid anything that causes intense or sharp pain or instability. Remember, foam rollers are best for muscle-related discomfort or used as part of an active warm-up to prep your working muscles for exercise.
“[Foam rolling] won’t help with disc-related pain, nerve-related pain, or joint-related pain,” Dr. Mukai adds, “And as always, any nerve-related symptoms like numbness, weakness, and bowel or bladder incontinence should be a red flag to seek medical help.” (Here are silent signs of a slipped disc.)
Foam rolling exercises for back pain
For each of the following exercises, roll slowly and steadily across the targeted muscle group, then back again, focusing on each muscle group for roughly 60 to 90 seconds. If you do find a sore point and applying pressure feels good, remain in place with direct pressure on the knot for one to two deep breaths. Rock slowly over the spot for one to two more breaths. Then continue to roll. Repeat as needed, but don’t try to beat the knot into submission.
If, after a session, you feel more pain or experience bruising, you’re likely overdoing the pressure and ultimately causing more tissue damage. Wait until the damage you’ve incurred has fully healed before trying to roll again. This time do it with a lighter touch, and possibly a softer roller. (Also, try these exercises for lower back pain.)
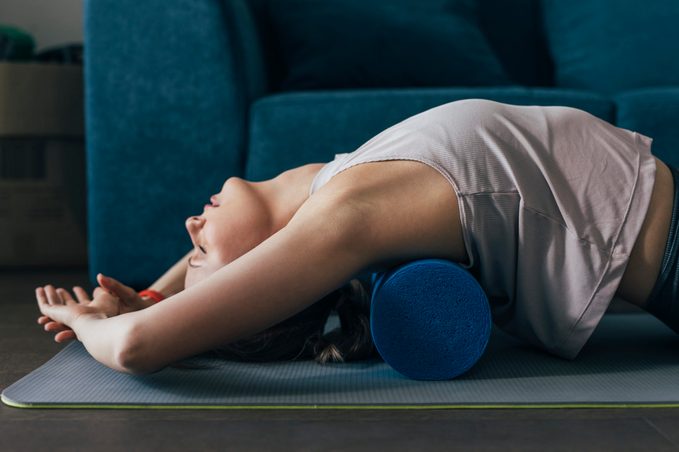
Mid-back roll and extension
Maura Blackstone, a physical therapist and certified yoga instructor, points to gentle mid-back rolls and extension if you have upper back or neck pain.
How to do
Sit on a mat in front of the foam roller, your knees bent, and your feet flat on the ground. Lean back, resting your mid-back on the roller, and place your hands lightly behind your head and neck for light support.
Engage your abdominals, press through your heels, and lift your glutes from the floor, so you’re balancing on the balls of your feet and the roller. Using your heels to guide the movement, slowly and steadily roll the foam roller across your thoracic spine (your mid- to upper-back). After engaging in this light massage for 30 to 60 seconds, lower your glutes to the floor. In a slow, controlled fashion, allow your back to relax over the top of the roller, performing a thoracic extension.
Hold for two to three breaths before lifting your torso back to the starting position. If desired, move the foam roller slightly up or down your spine, and perform another extension. (These are the habits that are damaging your spine.)
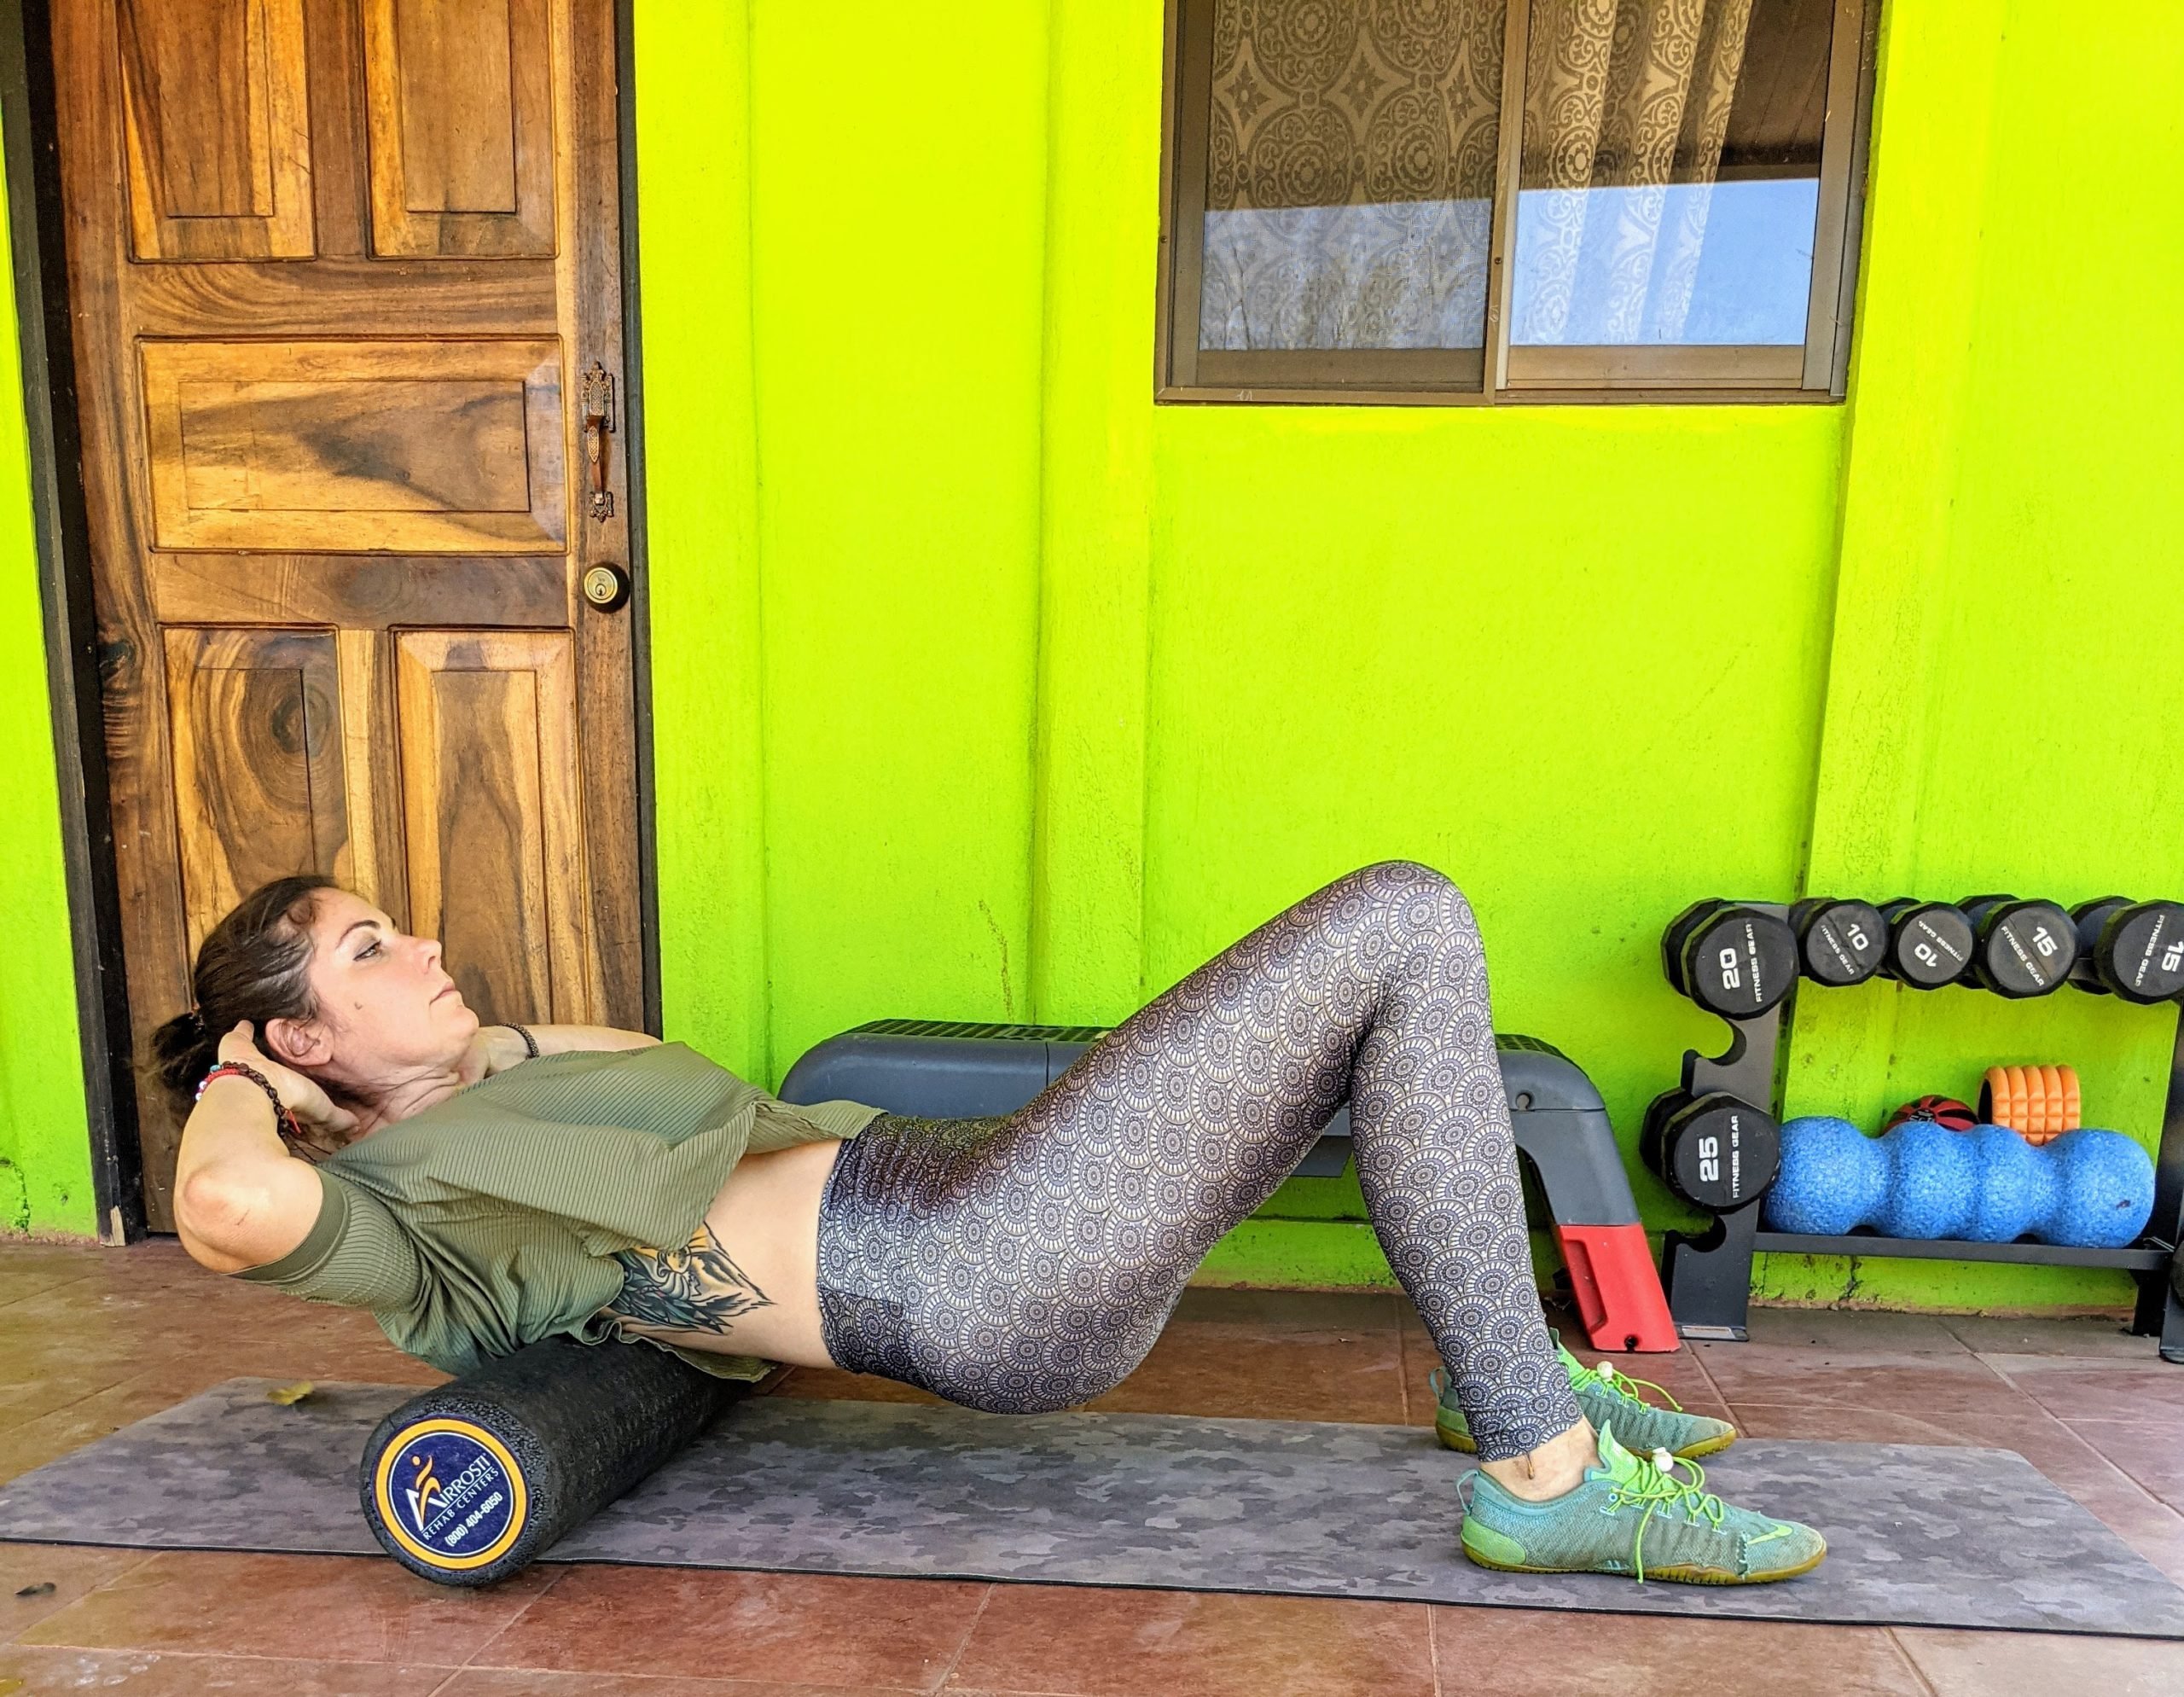
Glute roll
If you’ve been experiencing low back pain, you might have tightness in your hips. Rolling your glutes may help alleviate this pain by loosening up your hips.
How to do
Sit on the foam roller with your knees bent, feet flat on the ground.
Engage your core, lean back, and place your right palm on the ground behind you for added support. From here, shift your weight to the right, placing more pressure on your right glute. Lift your right foot from the floor and place the outside of your right shin across your left thigh.
Here, you’re supported by your right palm, your glutes on the roller, and your left foot. Place your left hand on your left thigh or knee.
From this position, roll backward and forward across your right glute on the foam roller for 30 to 60 seconds. Pause as desired when you find a tight spot. Then, for the next 30 to 60 seconds, shift your weight more to the right, then back to the left as you roll. This will allow you to seek out other spots in your right glute that may be tight or sore.
Repeat entire move, focusing on the left glute. (Here are the best butt workouts besides squats.)
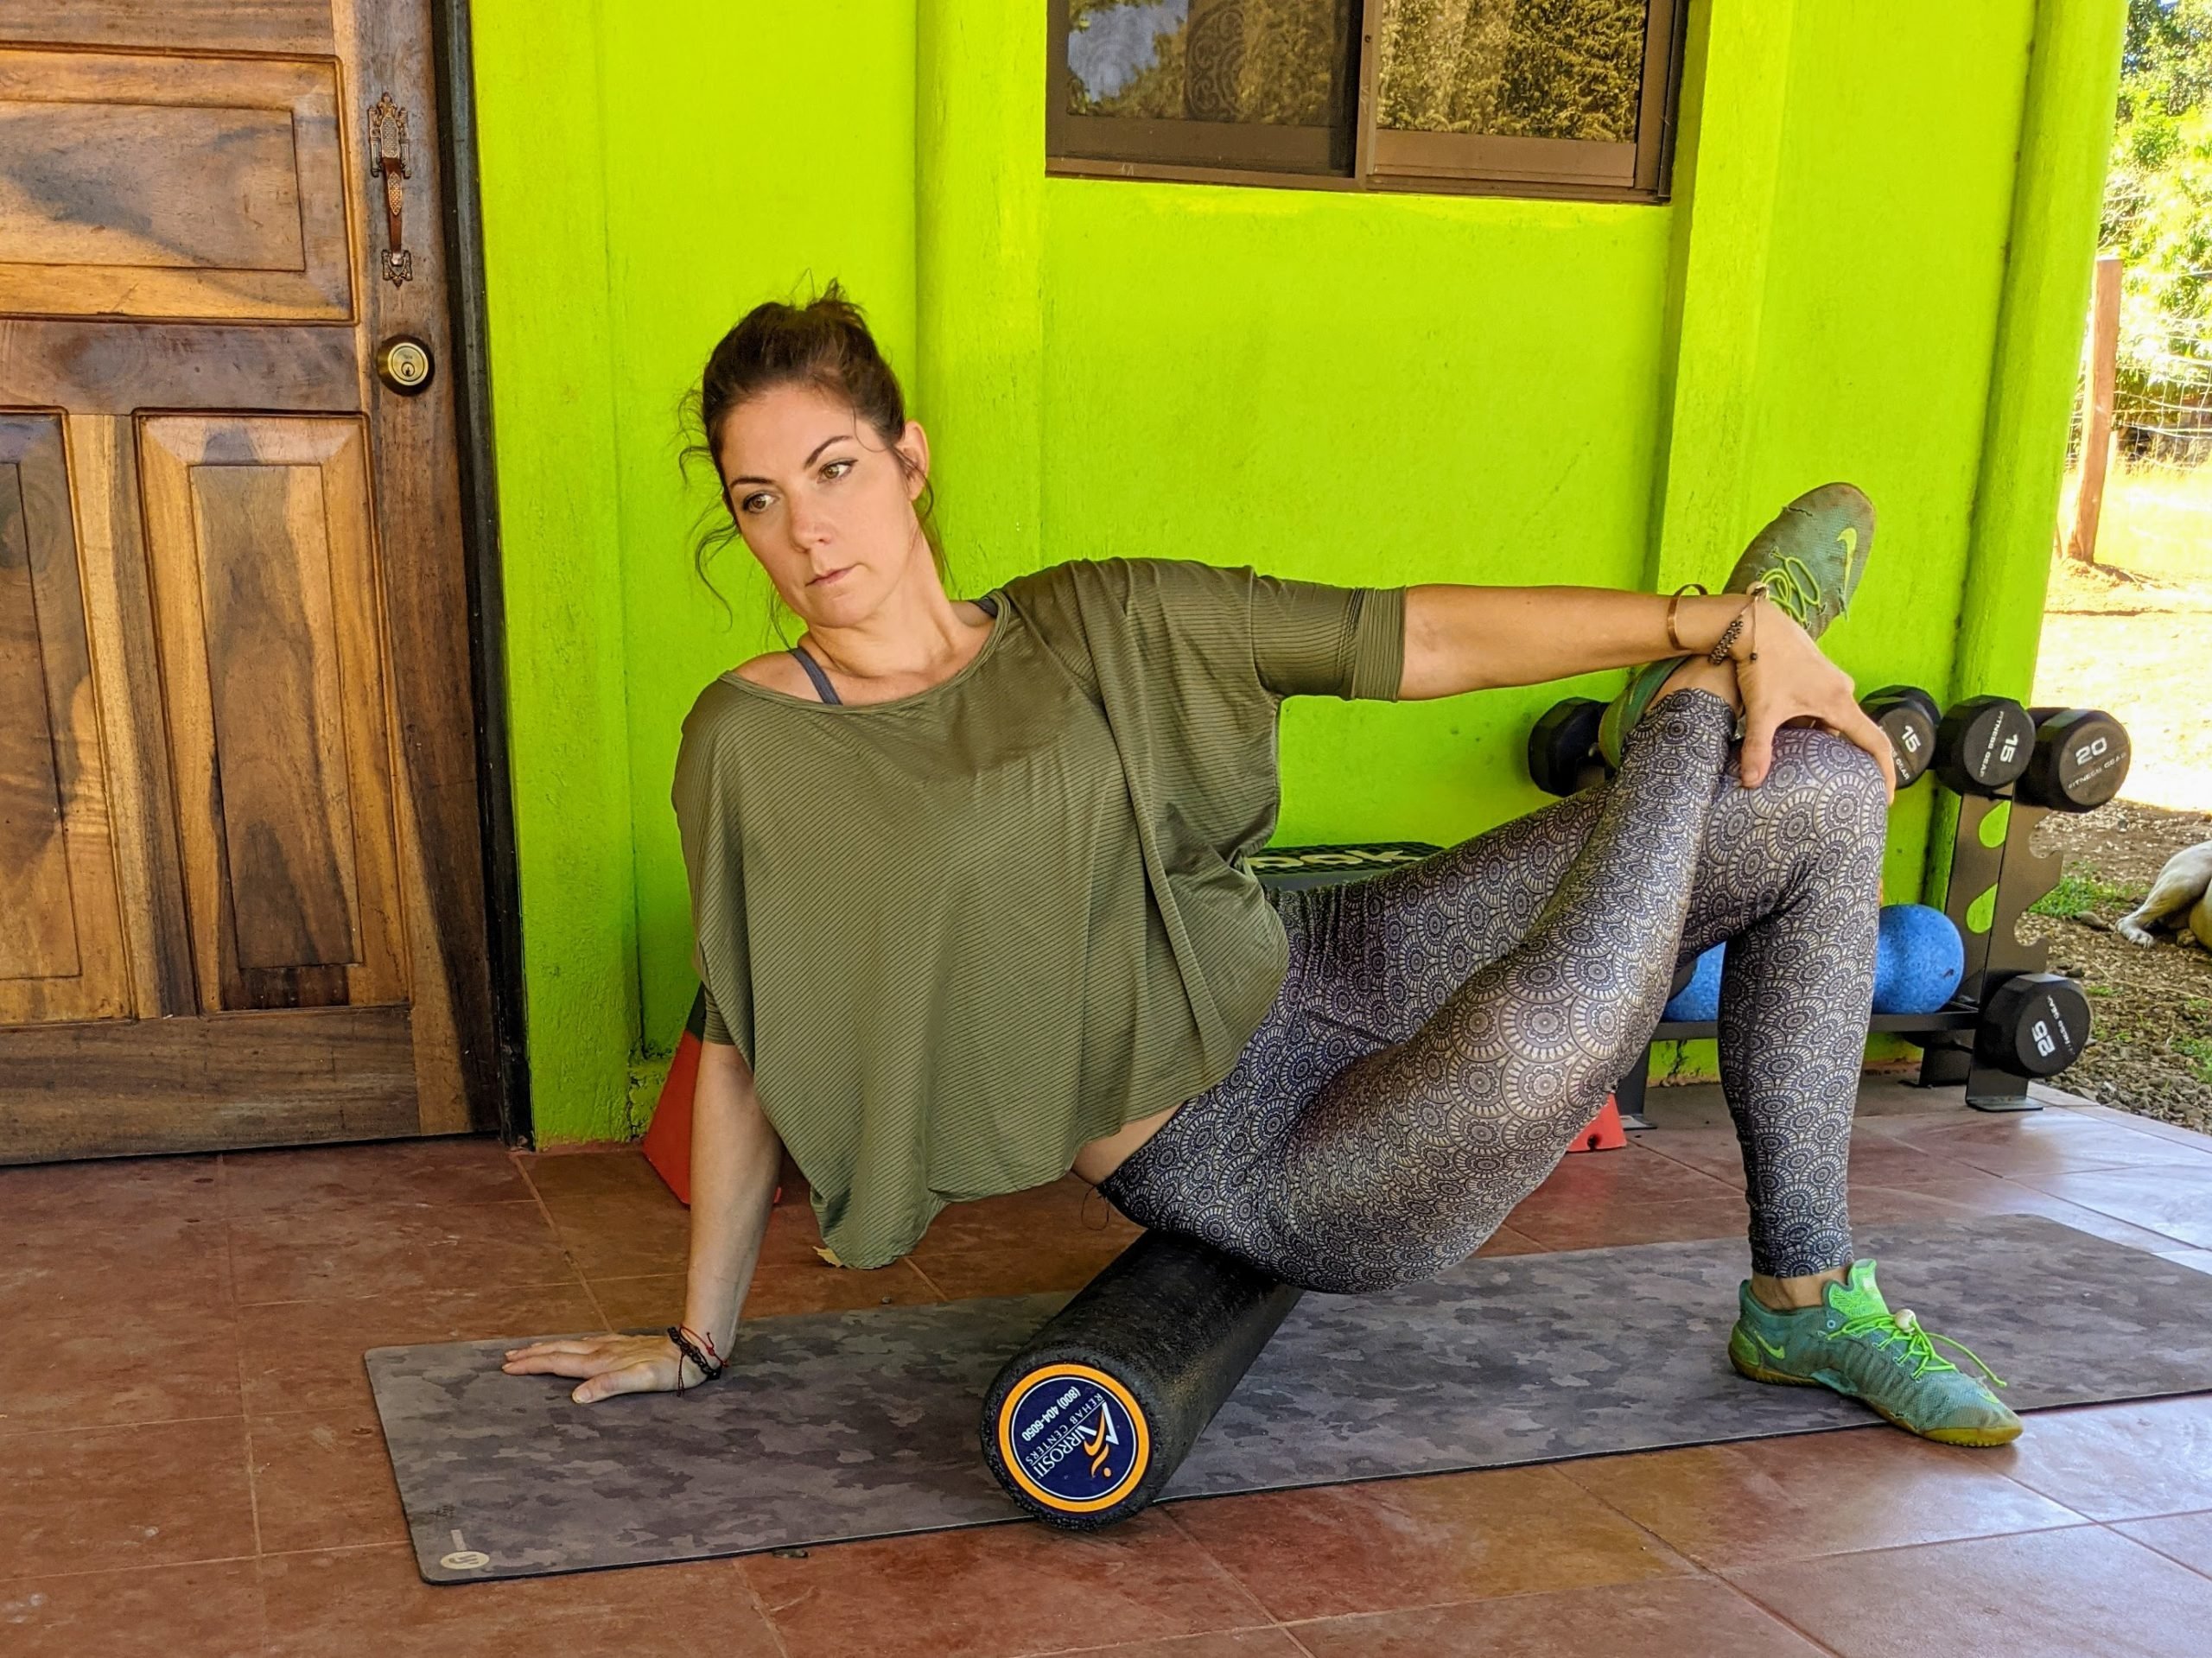
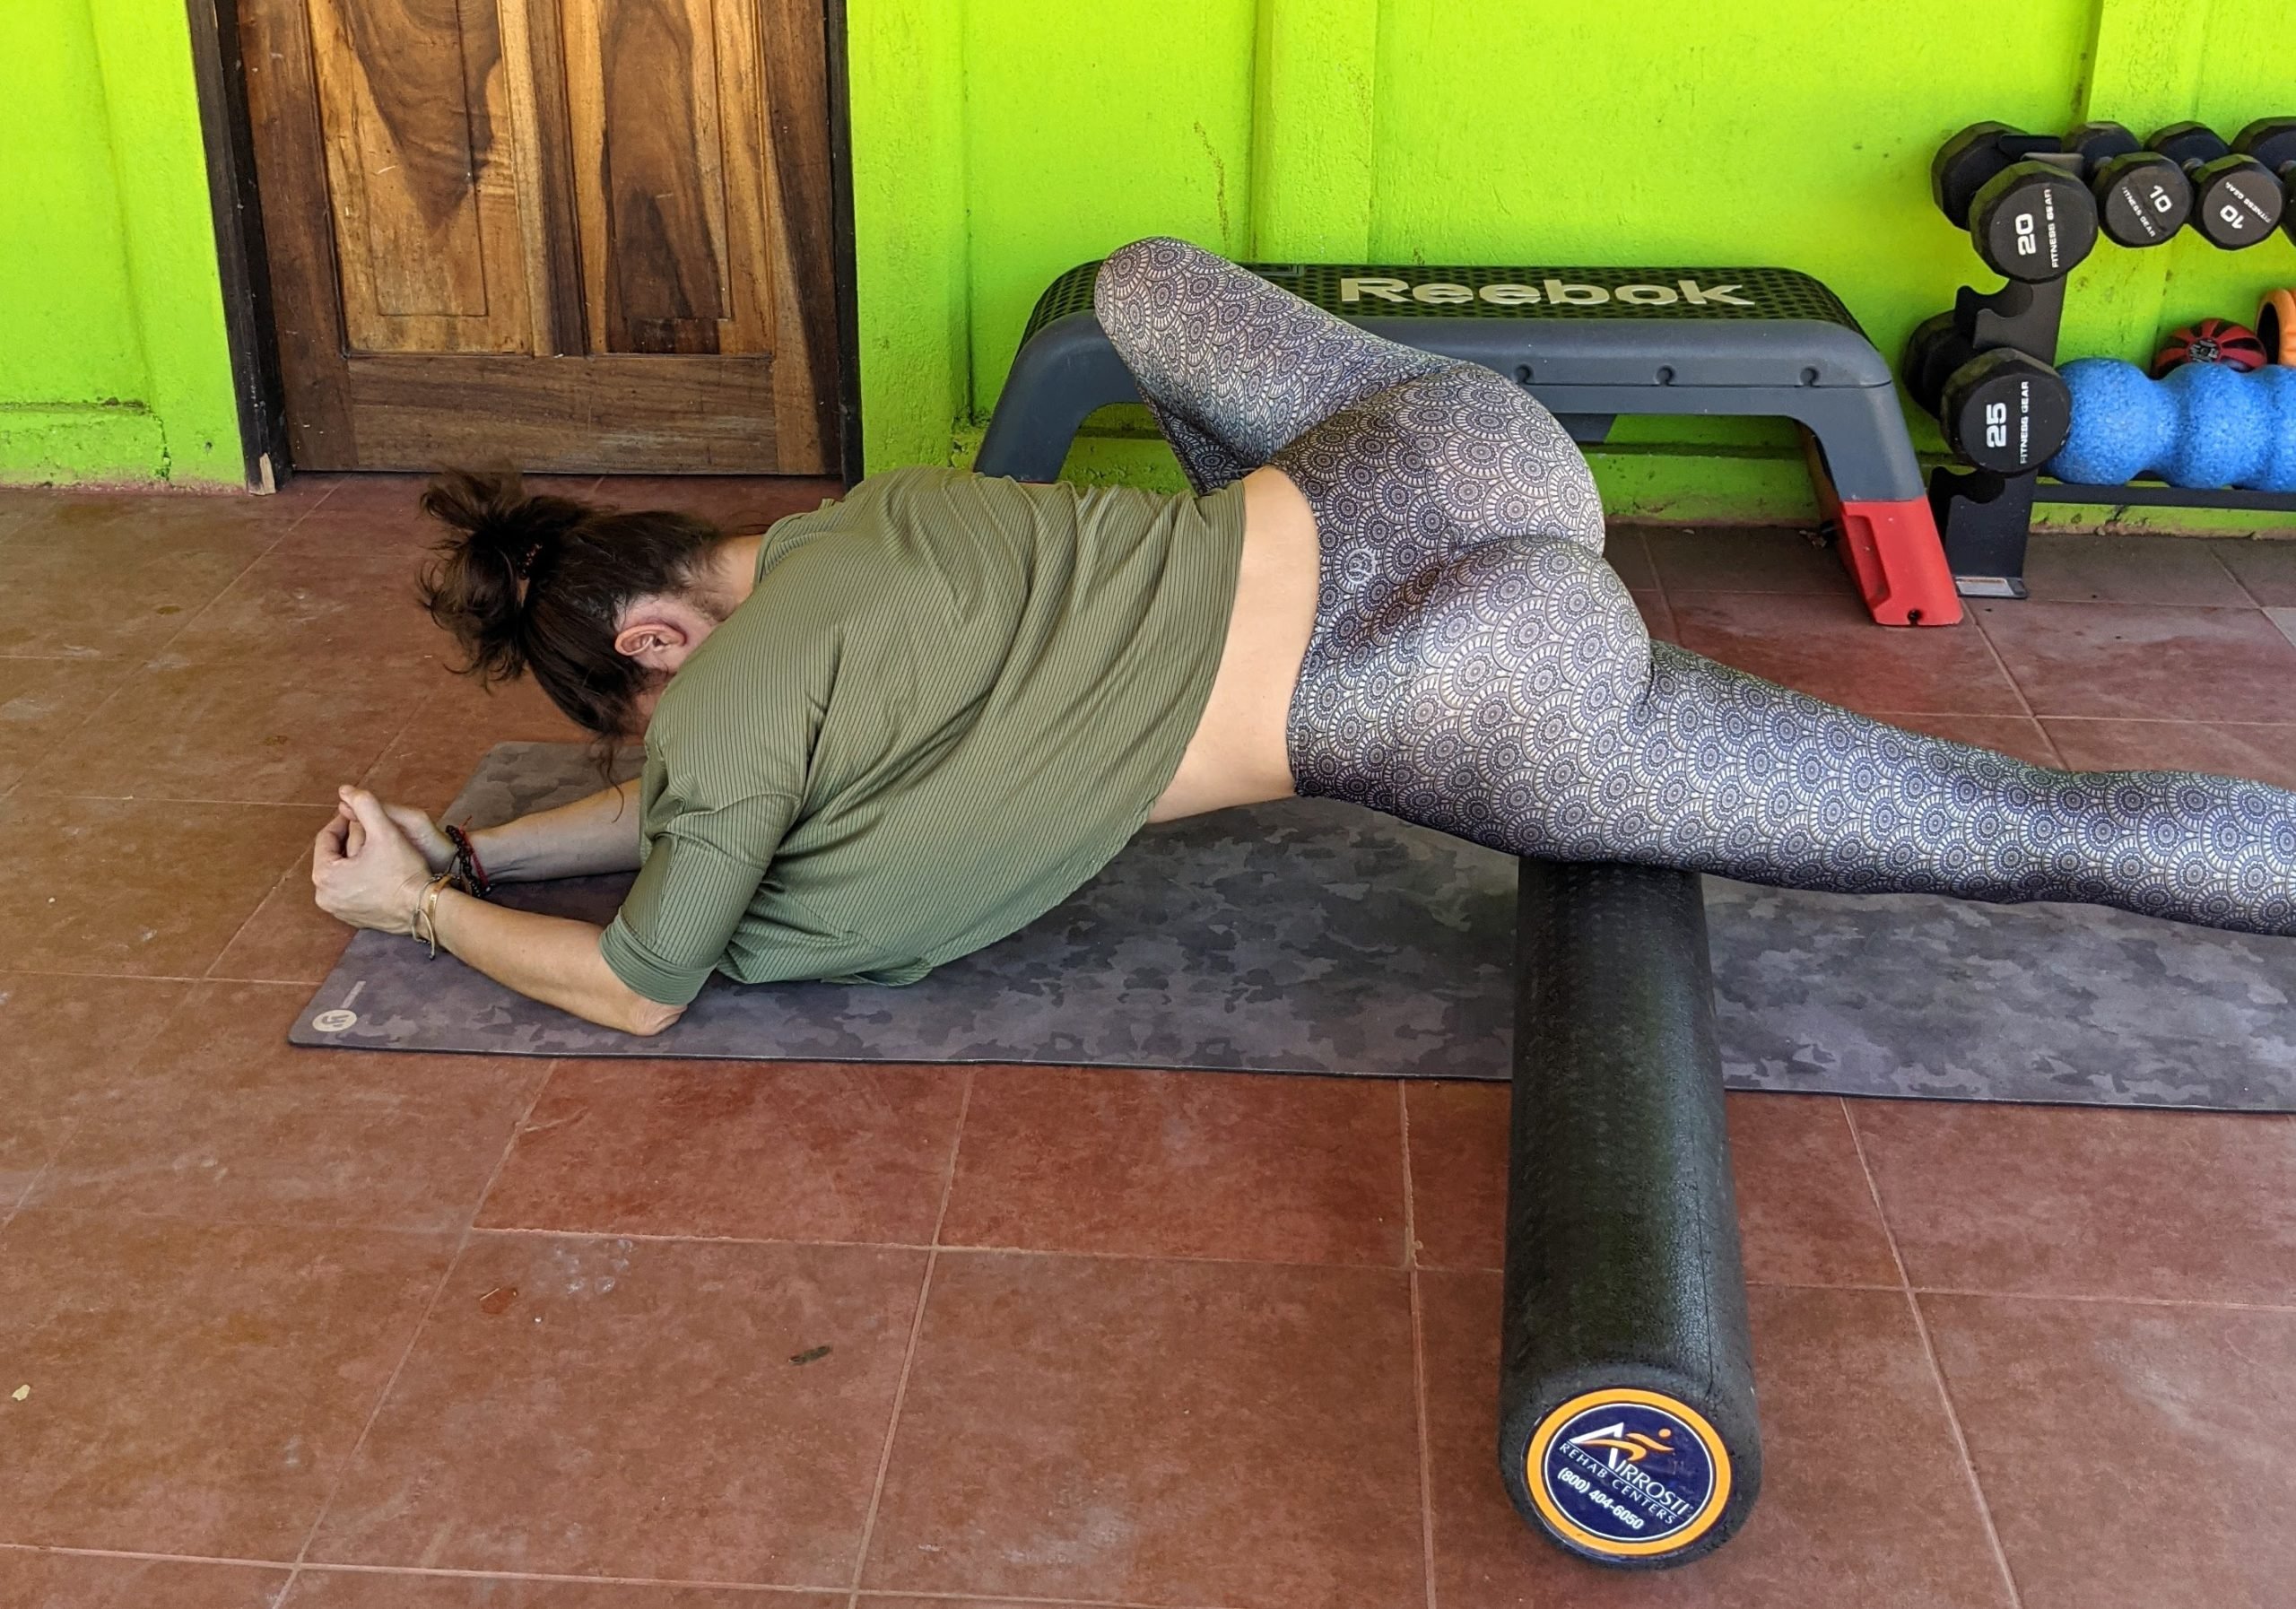
Quadriceps two-legged roll
Many back problems stem from tightness or soreness that originates elsewhere on the kinetic chain. Rolling out the quads, hamstrings, and glutes can help improve mobility in the lower body and hips that may end up alleviating tightness in the low back.
The issue with the quadriceps roll (as well as other lower-body rolls) is it takes a measure of core strength to perform the two-legged roll correctly. If the two-legged roll is too challenging, try the single-leg roll (and these no-equipment quad stretches).
How to do
Kneel on the ground in front of the foam roller, with the roller at your knees. Lean over the foam roller and place your forearms on the ground. Engage your core and step your feet backward into a plank position with your thighs on top of the roller, just above your knees. Your core should be engaged; you don’t want your low back to sag.
When you feel stable, lift your toes from the floor. Use your forearms and shoulders to help roll your quads slowly across the top of the foam roller between your knees and hips. After about 30 to 60 seconds of rolling, try pointing and flexing your feet as you roll, or shifting your legs from side to side slightly to target your quads from different angles for another 30 to 60 seconds.
(Also, try these thigh exercises to tone your legs.)
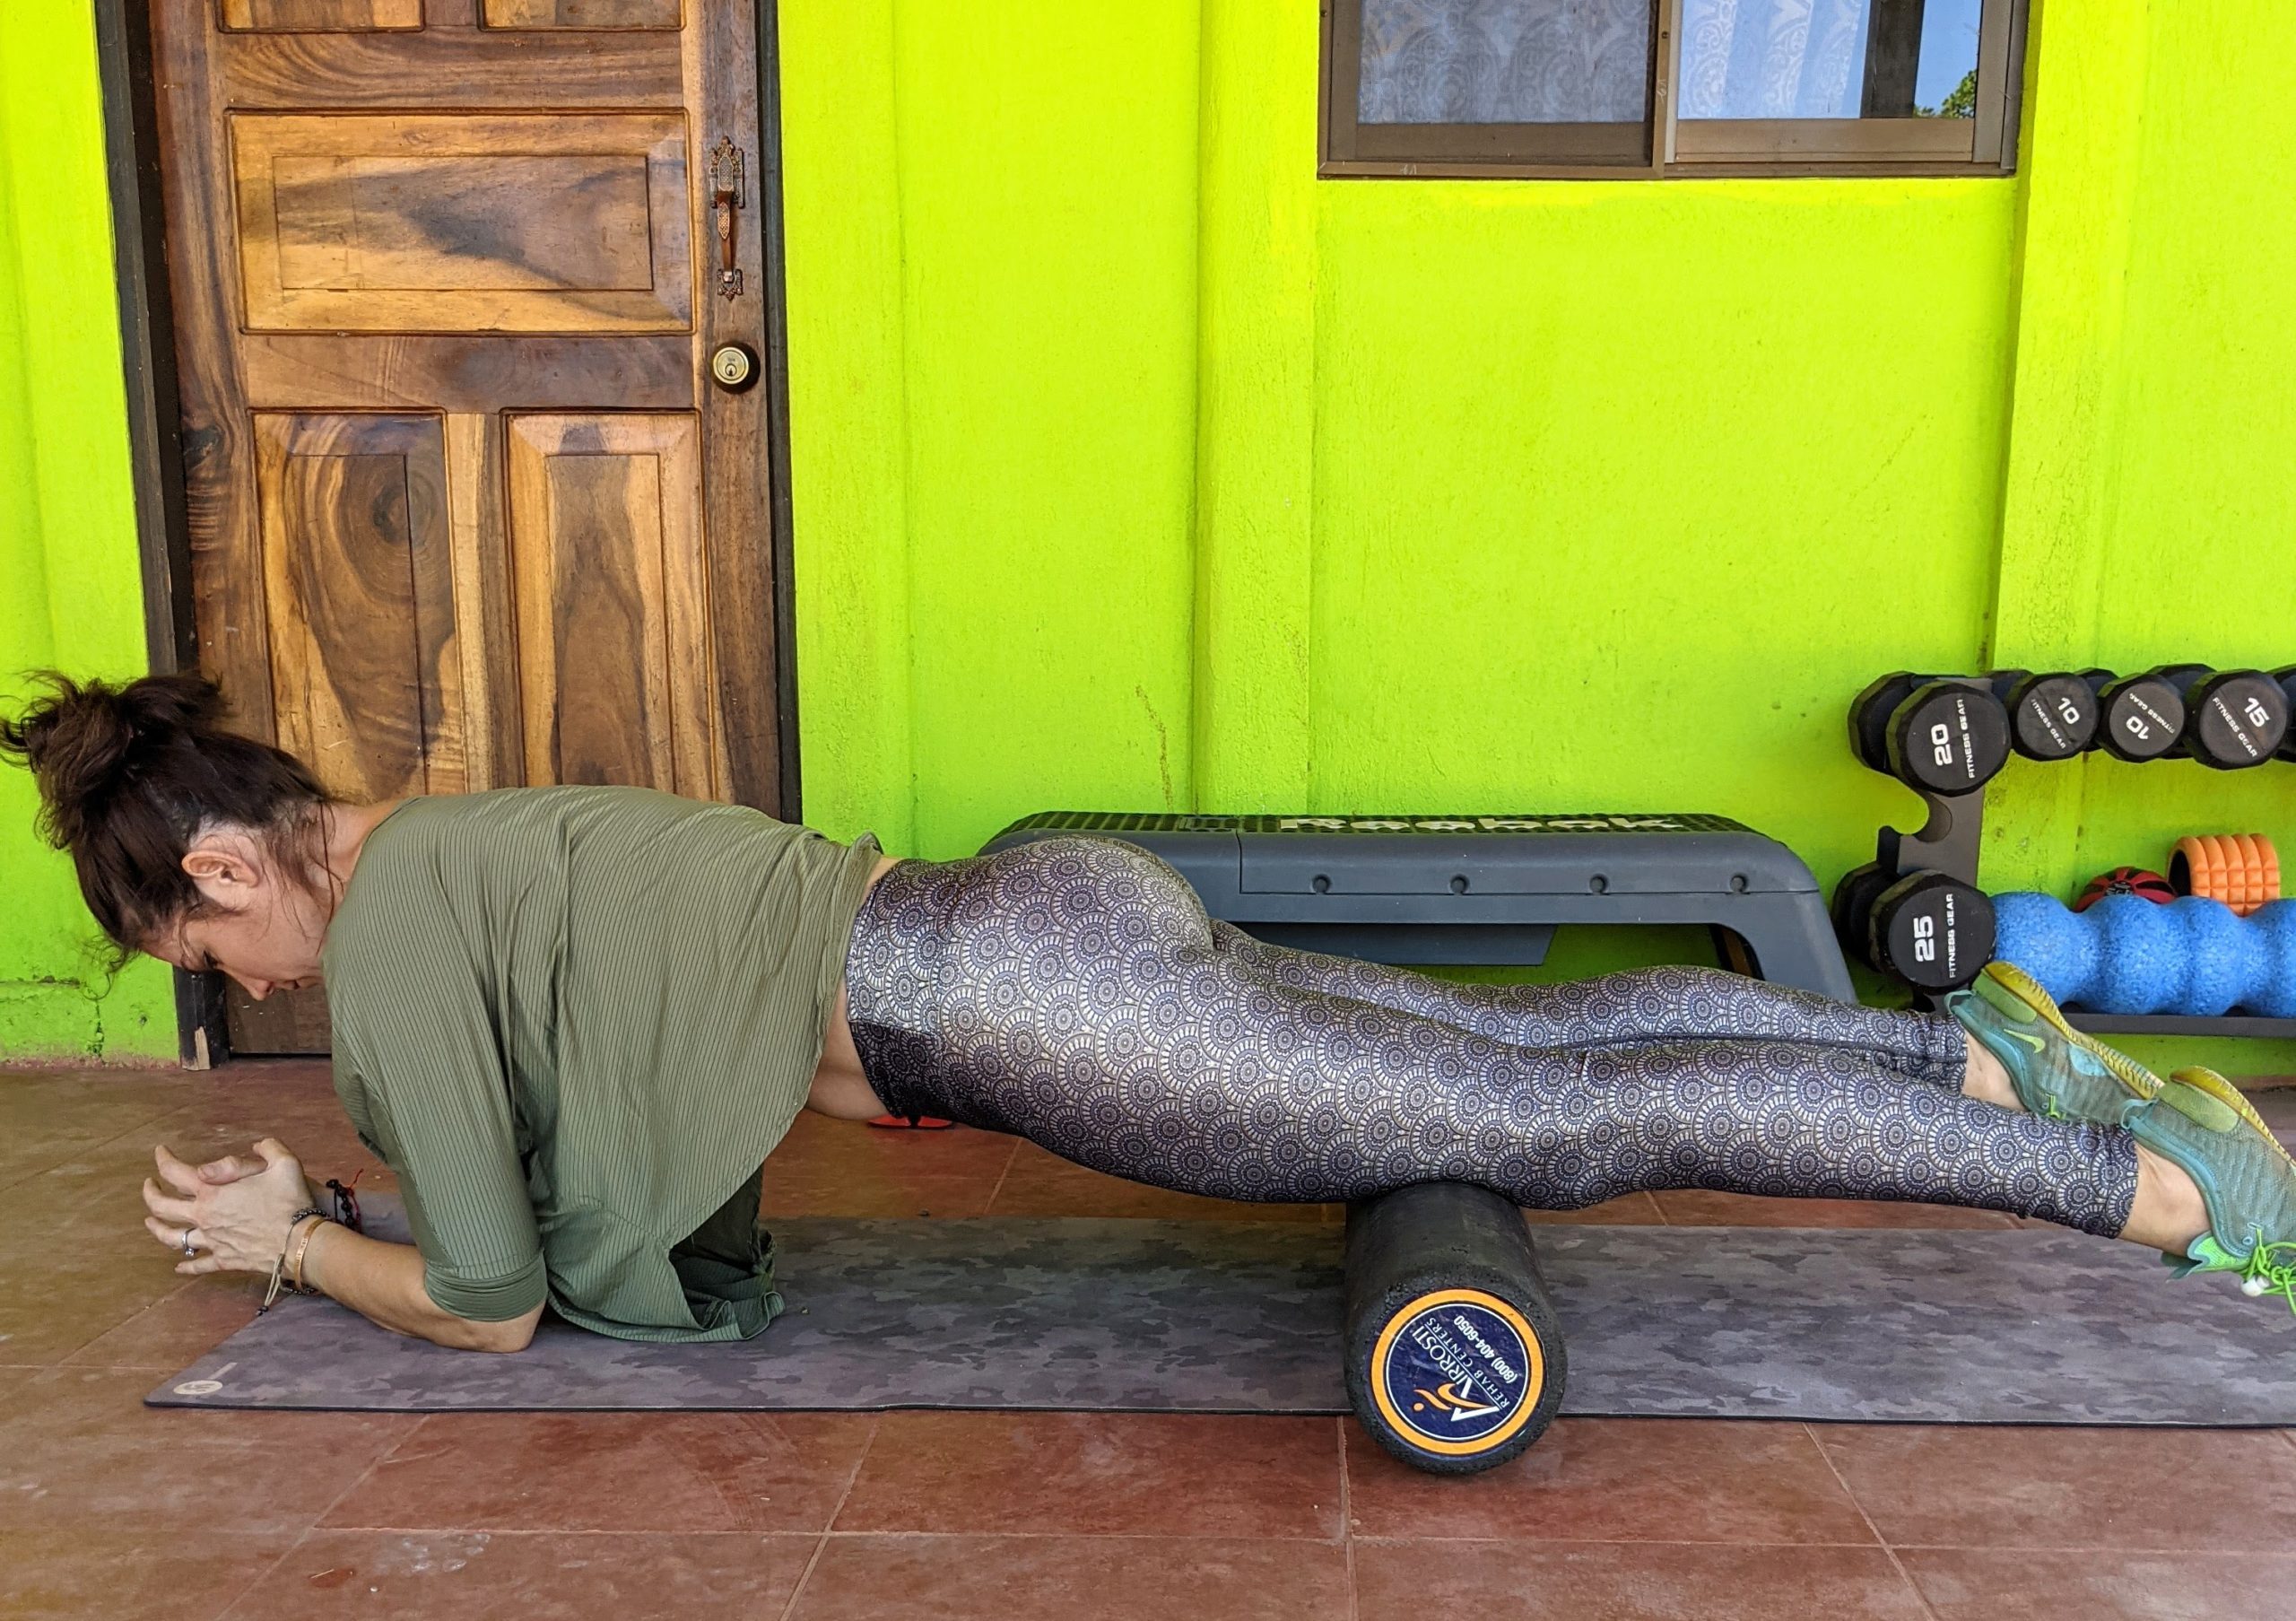
Quadriceps single-leg roll
The quadriceps roll using a single leg isn’t that much different from the two-legged roll. But you use one leg to help offer stability. The catch, of course, is that this requires a bit of flexibility at your hips.
How to do
Set up as you would for the two-legged roll, in a plank position above the foam roller. But this time have the roller positioned farther to the left so that you rest only your left thigh on top of the roller. From here, step your right foot forward and to the outside of the roller. Bend your knee and place your foot flat on the ground to offer additional stability.
Lift your left foot from the ground and—using your forearms and your right foot for assistance—roll your left quad slowly across the top of the foam roller for 60 to 90 seconds. Rotate your left foot in and out. Flex and extend your foot to target the quad in different ways. (Psst, these are the moves fitness trainers wish you’d stop doing.)

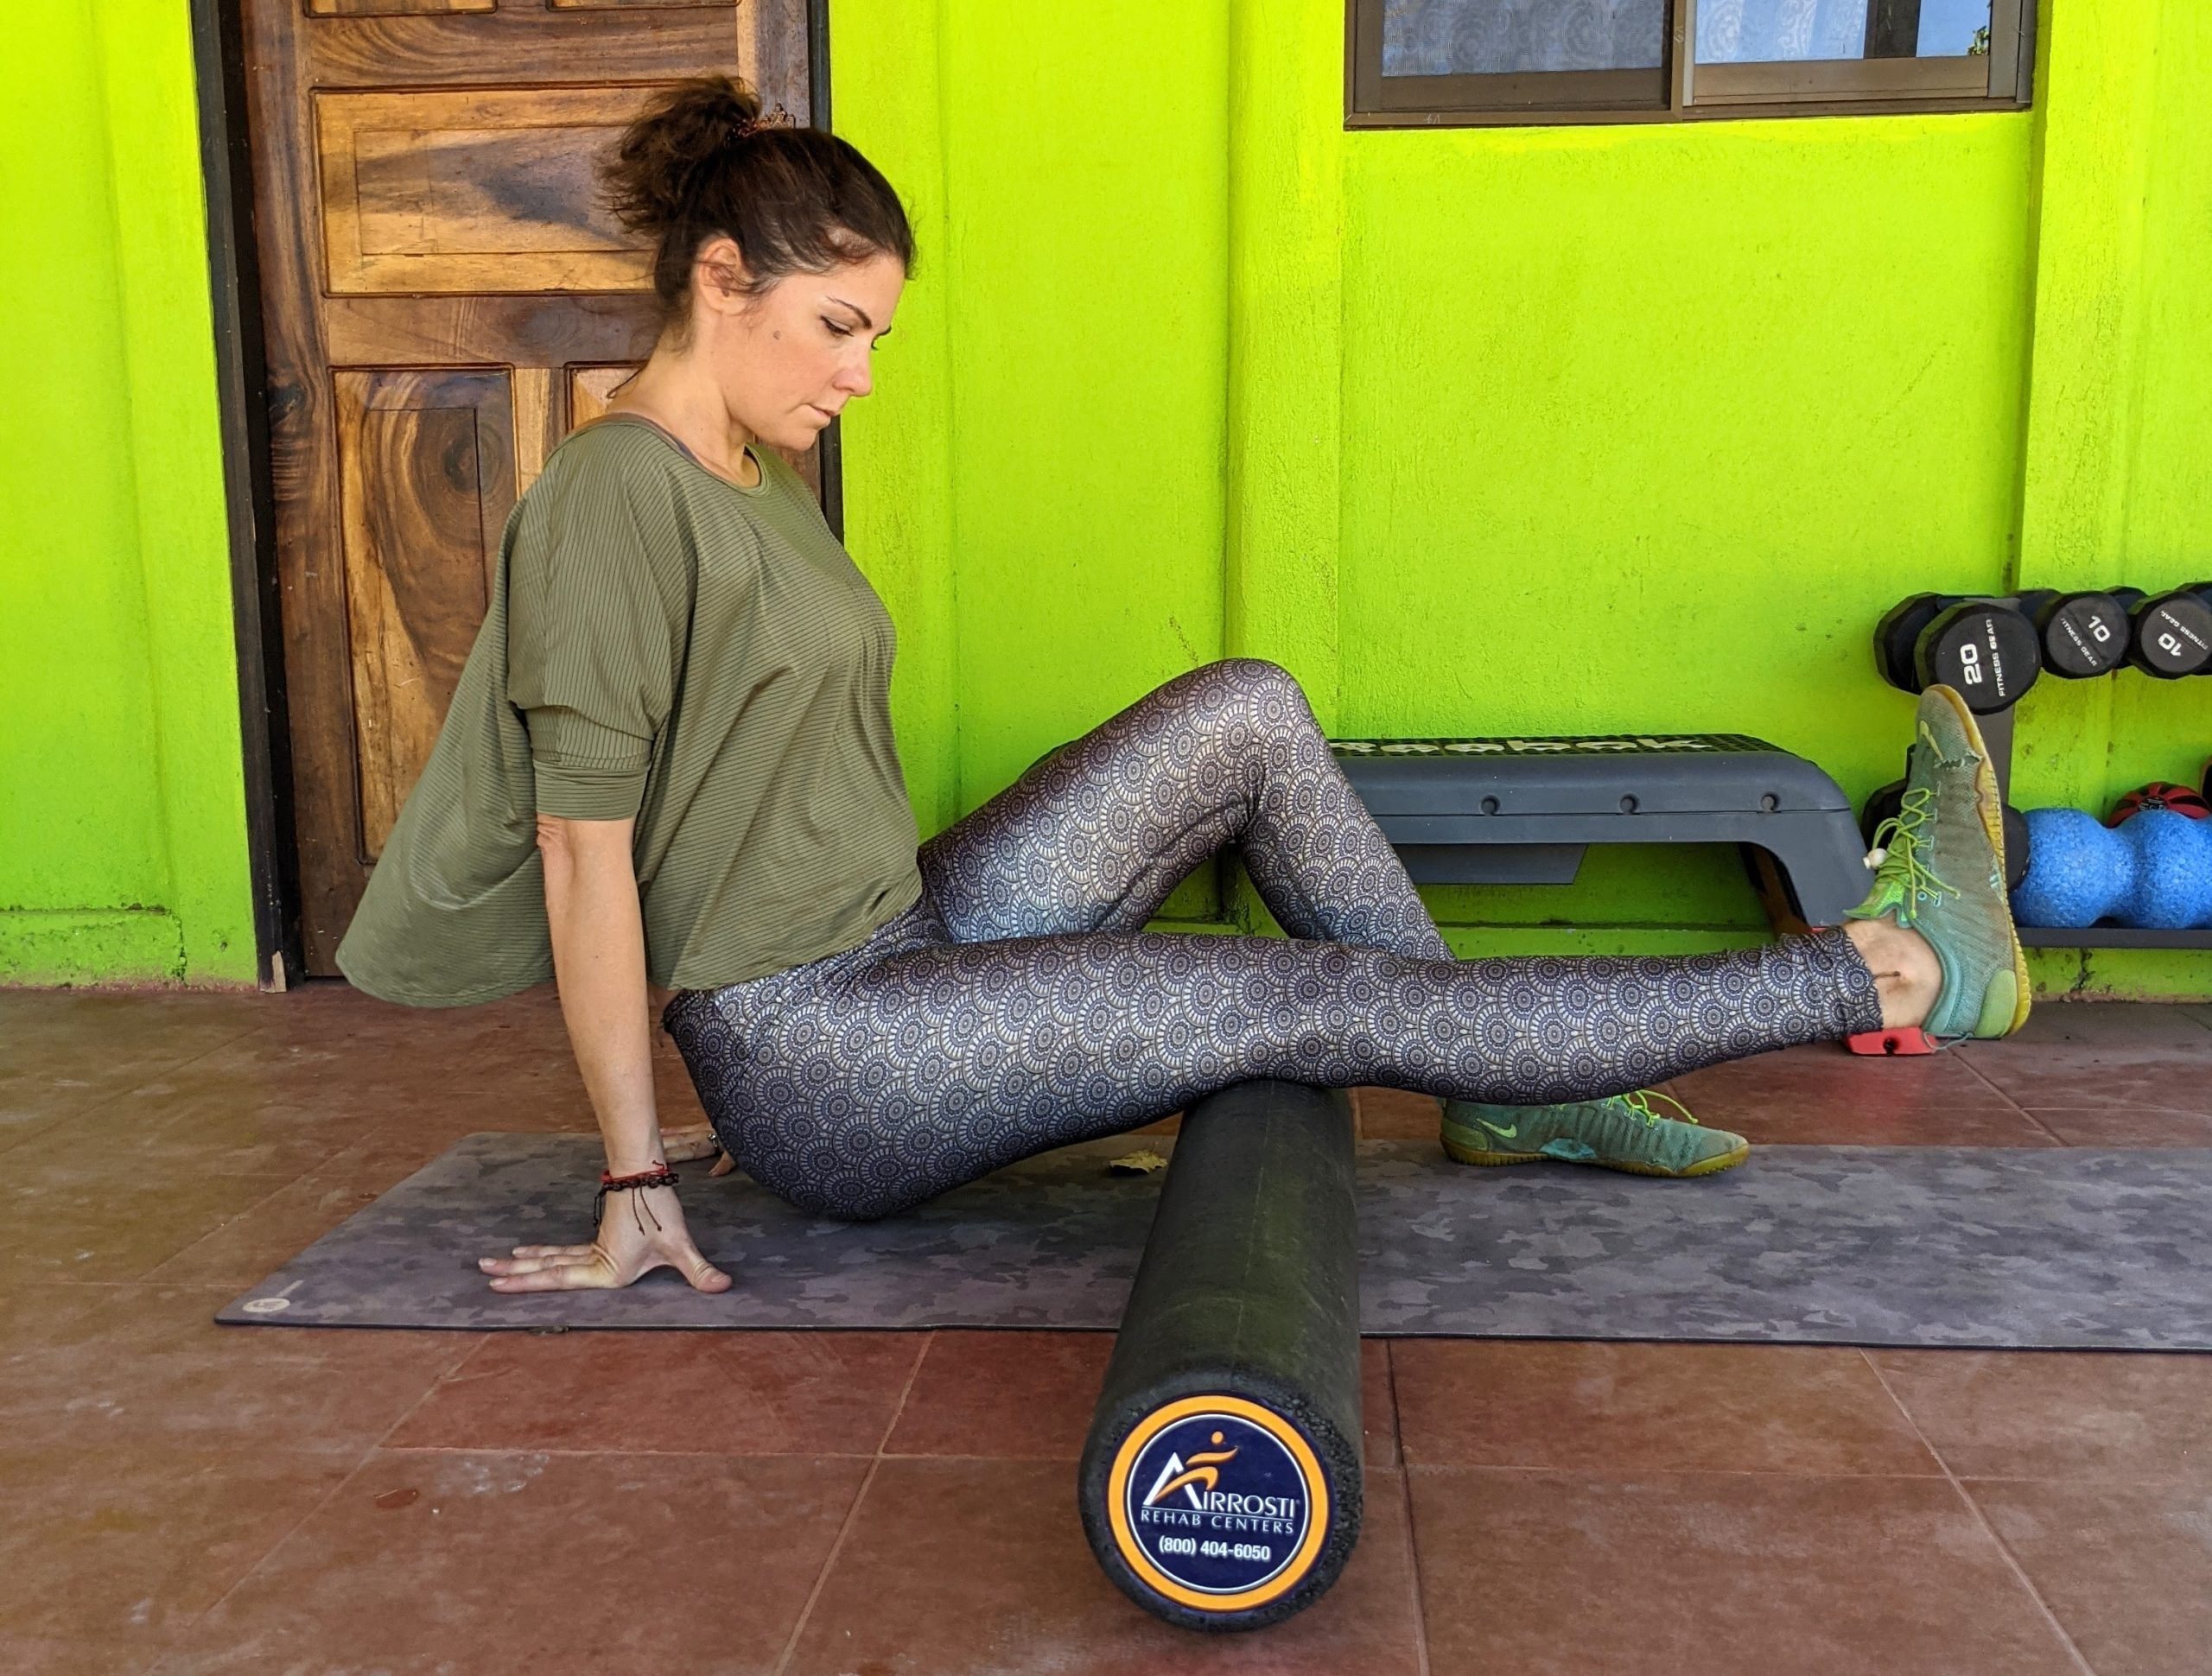
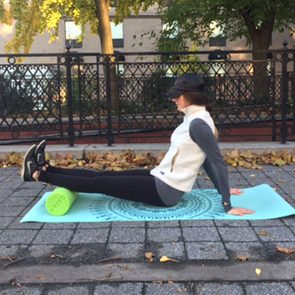
Hamstrings two-legged roll
The hamstring roll is very similar to the quadriceps roll. But it targets the back side of your legs.
How to do
Sit on a mat with your knees bent and your feet flat on the ground with the foam roller positioned against the tops of the back of your thighs (right below your glutes). Engage your core and lean back, placing both hands on the ground slightly behind your hips, your fingers pointing backward.
Extend your knees (your feet lifting off the ground). Using your palms and arms for support, lift your glutes from the ground so you’re supported on your hands and the foam roller.
Using your upper body and core to help guide the movement, roll slowly across the top of the foam roller, massaging your hamstrings between your knees and glutes. Flex and extend your feet, and internally and externally rotate your legs to hit your hamstrings at slightly different angles. Continue for 60 to 90 seconds.
(Here’s how to get get rid of pain on the inside of the knee.)
Hamstrings single-leg roll
If you find the two-legged hamstring roll to be too challenging for balance reasons, the single-leg roll may be easier to perform as it uses one leg for additional support.
How to do
Set up exactly as you would for the two-legged roll. But, this time, position the foam roller slightly more to the right so that only your right hamstring is positioned on top of the foam roller. You’ll extend your right leg, but keep your left leg bent and your left foot flat on the floor for balance.
From here, you’ll use your arms and your left foot to help guide and support you as you roll slowly and steadily across the top of the foam roller. Extend and flex your foot, and rotate your right leg in and out to target your hamstring from different angles. After 60 to 90 seconds on your right leg, switch sides and target your left hamstring.
Next, learn what pain behind the knee can mean.
- Maura Blackstone, DPT, a physical therapist and certified yoga instructor, Empower Your Wellness
- Ai Mukai, MD, board-certified physical medicine and rehabilitation physician, Texas Orthopedics Sports & Rehabilitation Specialists, Austin
- Michael Ross, DC, chiropractor and strength and conditioning specialist at Seattle Sports Chiropractic & Rehabilitation and a diplomate of the American Chiropractic Rehabilitation Board
Originally Published: February 09, 2021