


4 Runner’s Knee Exercises That May Help Pain Around the Knee Cap

Updated: Jun. 30, 2022
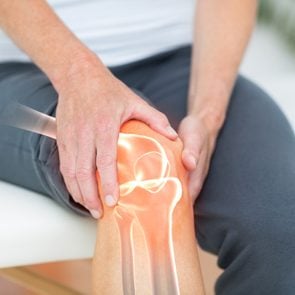
Runner's knee causes pain around and under the knee cap and it isn't always due to running. Whatever reason you have patellofemoral pain syndrome, these runner's knee exercises may help.
What is runner’s knee?
Technically, you don’t have to be a runner to end up with runner’s knee, but as the name suggests, the chronic pounding and biomechanical changes that often take place in avid runners lend themselves to the condition.
“Runner’s knee is also called patellofemoral pain syndrome,” explains Steve Yoon, MD, a physiatrist and director of The Regenerative Sports and Joint Clinic at Cedars-Sinai Kerlan-Jobe Institute in Los Angeles and head team physician for the Los Angeles Clippers. “It refers to pain that is generated underneath or around the kneecap.”
In other words, it’s knee pain. But before you start thinking, “Great—running is bad for the knees, obviously I shouldn’t be running,” according to Dr. Yoon, the pain isn’t necessarily caused by running.
Pain around the knee cap
The pain from runner’s knee is more related to misalignments of the kneecap and how it tracks over the thigh bone (the femur) when doing activities like walking, kneeling, or running.
In other words, the pain is a symptom of a biomechanical misalignment that can become exacerbated and aggravated when performing specific movements. And of course, because runners tend to log lots of miles, if they happen to have this misalignment, they’ll be prone to experiencing the pain.
(Here’s how to prevent knee pain while running.)
According to a 2019 article published in American Family Physician, the pain is most often related to instability of the kneecap.
And because the kneecap (the patella) is stabilized by multiple structures, including the quadriceps, patellar tendon, vastus medialis obliquus, medial patellofemoral ligament, and more, weaknesses or imbalances in any of these structures can contribute to runner’s knee pain.
An angle formed from the top, outside of the hip bone to the center of the kneecap, known as the Q angle, might play a part in a person’s susceptibility to the pain. Given that women tend to have wider hips, this angle tends to be greater in women.
Most men have Q angles around 14 degrees, while women tend to have angles around 17 degrees, according to the same American Family Physician article.
This increased angle in women places increased force on the patella. And while a direct cause-effect relationship of a greater Q-angle to runner’s knee symptoms hasn’t been found, women tend to be more susceptible to the problem, although that could be traced to other possible causes, such as decreased quadriceps strength.
Other factors that have been established as underlying causes of runner’s knee include foot abnormalities (which could contribute to changes in gait), dynamic valgus (when the knee “collapses inward” during certain exercises such as squats, jumping, or running), overuse or sudden increase in activity, patellar instability, and quadriceps weakness.
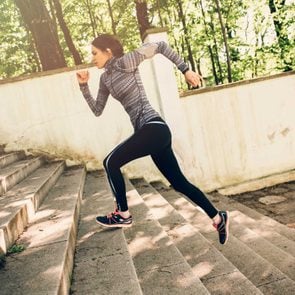
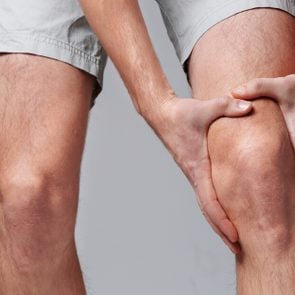
Knee pain when running
If you suddenly experience pain at the front of your kneecap that you associate with specific movement or exercises, the first thing to do is stop the activity that’s causing pain. Then, follow your standard home-based pain-relief strategies.
“Try ice and over-the-counter anti-inflammatory topical and oral medications,” suggests Dr. Yoon. “Soft tissue massage around the kneecap and leg may also help.”
And of course, if the pain doesn’t subside after a couple of days, and you’re still not able to return to your previous activity without exacerbating the pain, it’s time to visit your doctor or physical therapist.
“Further testing may include diagnostic imaging such as X-rays and a biomechanics evaluation to help establish a proper plan of care,” says Dr. Yoon.
And while following an exercise and therapy routine won’t solve your problem overnight, it can help.
If you enlist a physical therapist, they’re bound to give you a program that includes stretching and strengthening exercises that target the entire lower body, as well as the core.
The American Family Physician article suggests following a structured therapy routine that includes exercises performed three times per week for six to eight weeks, at a minimum.
Dr. Yoon says this type of rehab may take three to four months before you see results.
(Here’s how to prevent behind-the-knee pain.)
Exercises for knee pain
According to a 2015 article published in American Family Physician, there’s no one set of exercises that’s been determined to specifically help runner’s knee.
That said, a prescription of stretching and strengthening exercises is the first line of defense for helping relieve the pain.
Usually, these exercises focus on developing strength in the quads and hips, with additional stretching for the hamstrings, quads, hip abductors, and iliotibial band complex.
James de Lacey, a professional strength and conditioning coach for the international Rugby Union and Rugby League, points to isometric strengthening exercises as being particularly helpful when first working to relieve the pain.
“Isometric exercise is defined as producing tension without a change in length of the muscle. It’s often thought that isometric exercise involves no movement at all, but there’s always some movement happening whether you see a change in the joint angle or not,” says de Lacey, who is also an exercise and sport science published researcher.
“Isometrics allow the remodeling of collagen fibers in the tendon changing them from dysfunctional tendon to a healthy, functional tendon. Isometrics also have an analgesic, or numbing effect, so performing them before a workout can help reduce pain.”
If you’re trying to relieve the pain at home, consider these exercises suggested by de Lacey.
But remember, if the pain persists, make an appointment to see your doctor or physical therapist for a more personalized pain-relief prescription.
(Here’s how to get rid of pain on the inside of the knee.)
Wall sit
The wall sit is a classic isometric exercise that helps develop quadriceps, glute, and core strength.

How to do it
Stand with your back to a wall, leaning against it with your torso. Step your feet forward about two feet, so your legs are at a diagonal position to the wall. Position your feet about hip-distance apart, or a little wider.
Inhale and engage your core, pressing your low back and shoulders into the wall, ensuring good posture. You may want to place your hands on your hips. Bend your knees and slide your back down the wall, also bending your hips as you squat.
When your knees and hips are at 90-degree angles, hold the position, engaging your quads and glutes. Check your knees—they should be aligned with your toes, not angled inward (valgus).
Hold the position for as long as you can with good form, working your way up to 60 seconds. Complete a total of three to five sets.
Isometric split squat in the bottom position
An isometric split squat targets the quads and glutes, just as the wall sit does, but it does so more functionally, isolating each leg separately.
This helps develop side-to-side strength and correct possible side-to-side imbalances (particularly important if you tend to experience pain just on one side of the body).
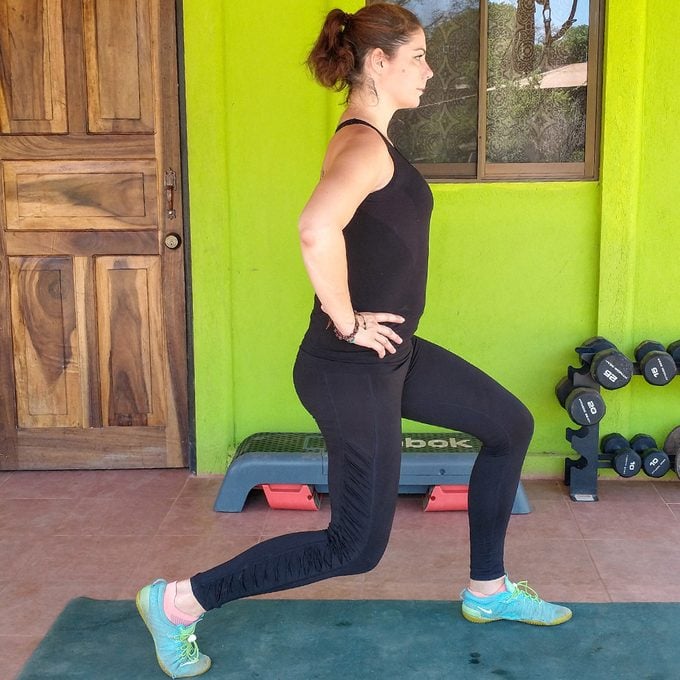
How to do it
Stand tall, your feet roughly hip-distance apart. Step back with your right foot about two feet, placing the ball of your right foot on the ground. Keeping your torso upright and tall (not leaning forward at the hips), inhale and engage your core, and as you exhale, bend both knees, lowering yourself about six to 12 inches.
You don’t want to experience pain, so if you tend to feel pain when lunging, don’t lower yourself to the point of pain. Rather, lower yourself to where you feel your left quadriceps engage, and check to make sure your left knee is aligned with your left toes (not collapsing inward). Hold the position, breathing steadily, for as long as you can.
Return to standing and switch sides.
Complete a total of three to five sets per side, aiming to work yourself up to 60 second per set.
(Try these thigh exercises to tone your lower body.)
Peterson step-up
The Peterson step-up is another exercise designed to improve side-to-side quadriceps strength and assist with improved kneecap tracking. Plus, this equipment-free movement is easy to do at home, making it an excellent option for home-based therapy.
All you need is access to a step or a raised surface about 6 to 18 inches off the ground.
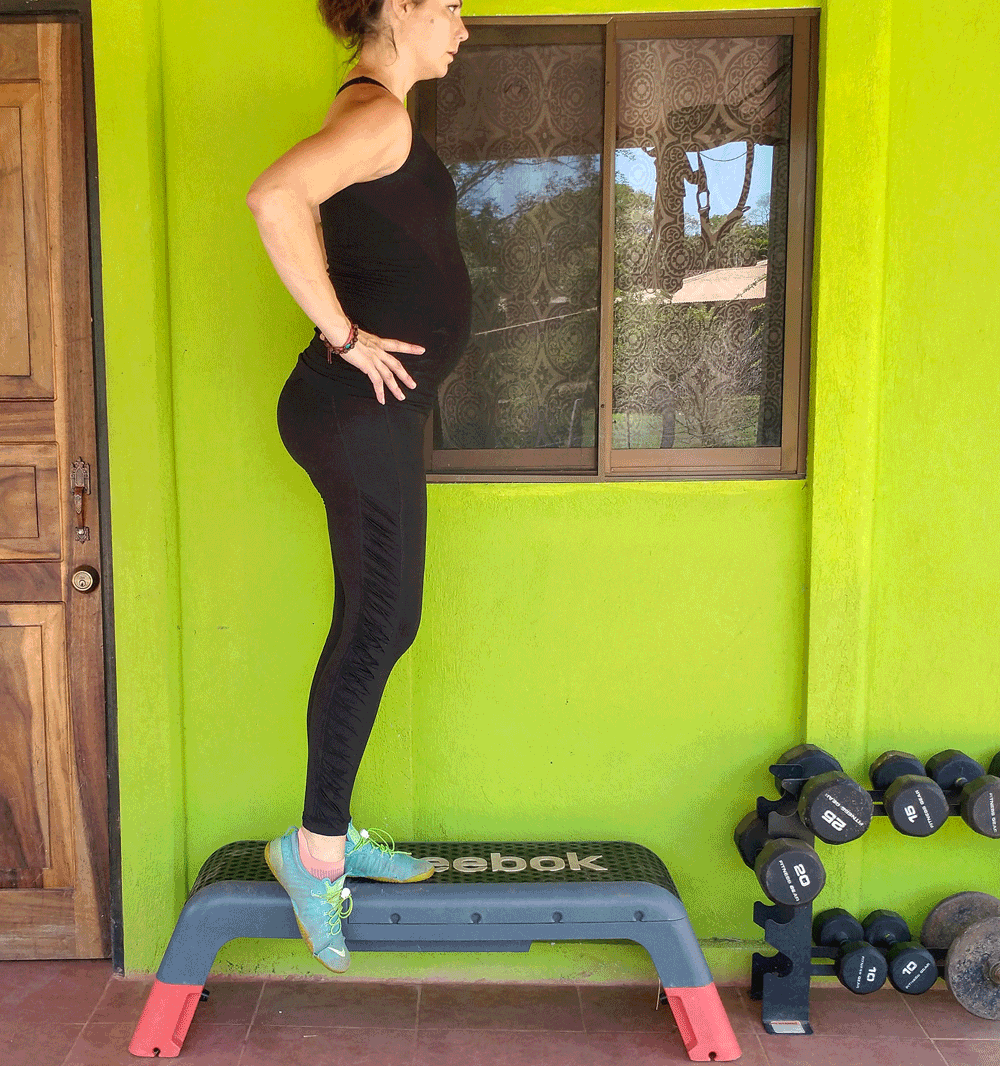
How to do it
Stand on the step with your feet together, your right foot at the edge of the step (you’ll be lowering it toward the floor). Engage your core and check for perfect posture, your ears aligned with your shoulders, hips, knees, and ankles. Hinge your torso slightly forward from your hips, keeping your torso straight and tall.
Move your right foot off of the bench and flex your foot, so your toes point upward. From here, you’re going to bend your left knee, which lifts your left heel from the bench so your weight is on the ball of your left foot, engaging the quads. As you bend your left knee, your right leg will lower straight down to the floor.
When your heel taps the floor, reverse the movement, straightening your left knee and returning your left heel to the step.
Complete three sets of 10 to 15 reps per side.
(Here are some hamstring exercises to do at home.)
Reverse Nordic curl
The reverse Nordic curl is another quadriceps strengthening exercise you can do at home with no equipment necessary.
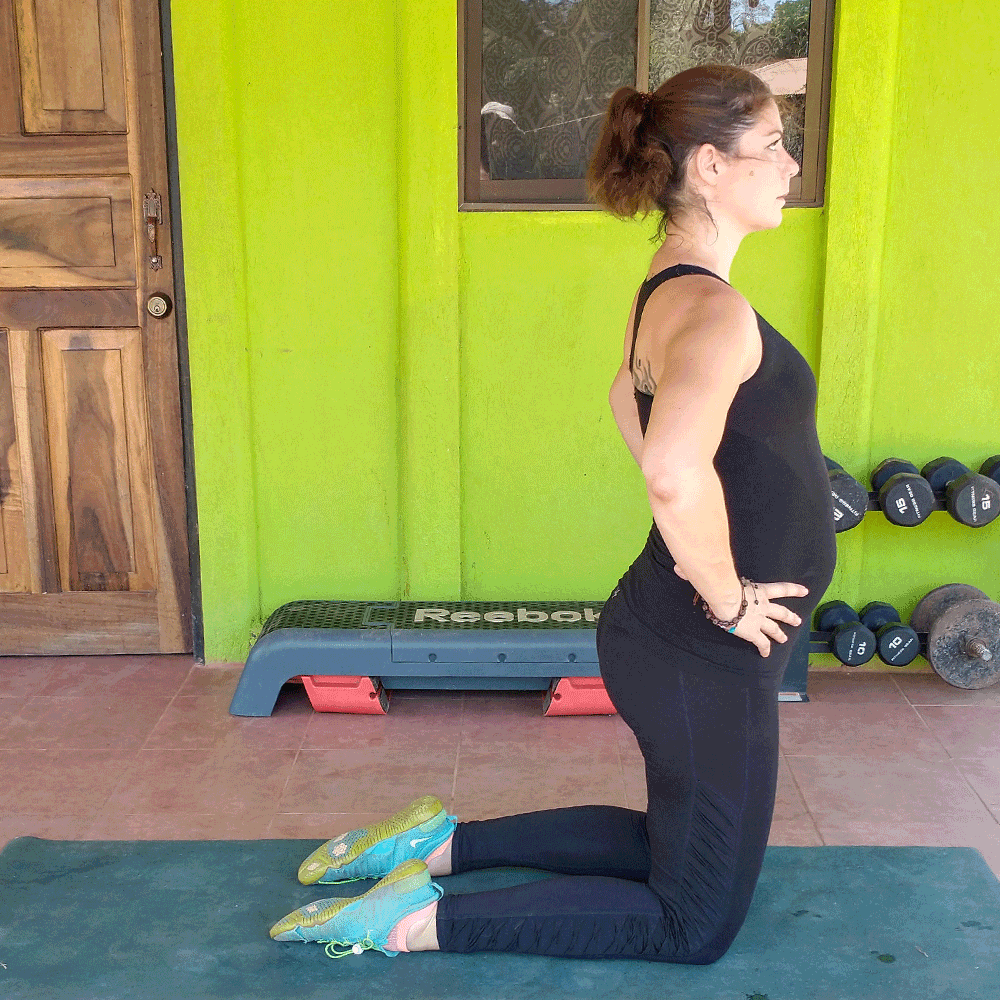
How to do it
Knee on a padded mat to help protect your knees and check your posture. Your shoulders, hips, and knees should be aligned. Cross your arms over your chest.
Take a breath in and engage your core, quads, and glutes. Lean back slowly, keeping your torso and thighs completely straight, controlling the backward movement carefully. When your body forms a 60-degree angle, use your glutes and quads to pull yourself back to the upright position.
Perform three to five sets of 10 to 15 repetitions.
Next, here’s how to deal with indoor cycling knee pain.
- Steve Yoon, MD, a physiatrist and director of The Regenerative Sports and Joint Clinic at Cedars-Sinai Kerlan-Jobe Institute in Los Angeles and head team physician for the Los Angeles Clippers
- James de Lacey, MSc, a professional strength and conditioning coach for the international Rugby Union and Rugby League and an exercise and sport science published researcher
- American Family Physician: "Patellofemoral Pain Syndrome"
- American Family Physician: "Nonsurgical Management of Knee Pain in Adults"
Originally Published: April 27, 2021